Payroll integration powered by Zapier
How an integration with your payroll via Zapier works and how to set one up
MyHR supports integration to payroll systems via Zapier. This allows your company to send information between MyHR and your existing payroll system (via Zapier) to create or update people and manage leave.
The path to integration is easiest if your payroll system also has a Zapier integration. Start by checking with your payroll system provider if Zapier is supported or search Zapier apps. If your payroll system provider is at the early stages of integration they may not appear on the Zapier list, so it’s worth checking with the provider directly even if they don’t show up.
If you find out that they don’t integrate with Zapier, you may still be able to use the MyHR - Zapier integration. Contact MyHR if you wish to explore this further.
READ: Introduction to the MyHR triggers and actions
READ: Part 1 - Create and authorise your Zapier integration
READ: Part 2 - Create Zaps to set up your leave balance types and leave request types
READ: Part 3 - Create Zaps to set up MyHR people to your payroll system
READ: Part 4 - Create Zaps to link your people
READ: Part 5 - Set up leave approvals and cancellations
READ: Part 6 - Display leave balances
READ: Data sent by MyHR triggers
READ: Data received by MyHR actions
READ: Getting help with your Zapier integration
Introduction to the MyHR triggers and actions
Zapier works by connecting a trigger in the source app (e.g. leave approval in MyHR) to an action on the destination app (e.g. create a leave record in a payroll system).
MyHR supports a range of triggers (to send data out) and actions (to receive data):
- Set up leave balance types and leave requests types for your business
- Employee details (name, email, job title etc.) to set up people in your other system
- Linking employees between systems
- Approved & cancelled leave requests for employees
- Displaying leave balances for employees
- Employee status change notifications:
- Employment agreement signed
- Deactivated (which happens after someone resigns)
- Activated (which happens when someone is re-hired)
Your payroll system will also support a range of triggers and actions and you will need to determine which triggers you are interested in (Payroll or MyHR) and the corresponding actions on the other system (MyHR or Payroll) that will receive this information.
Other actions in MyHR
MyHR also has an action available to create a ‘Draft Person’ in MyHR.
There is an action to create a NZ draft person and an action to create an AU draft person. You can use this action if your employees are set up in your payroll system first to pull them into the MyHR platform. Once you've imported your people, you will need to sign in to MyHR to finalise your employee details.Part 1 - Create and authorise your Zapier integration
To set up a Zapier integration in MyHR, you first need to give Zapier permission to access your MyHR data:
- Login to MyHR and select ‘Manage Integrations’ from the menu.
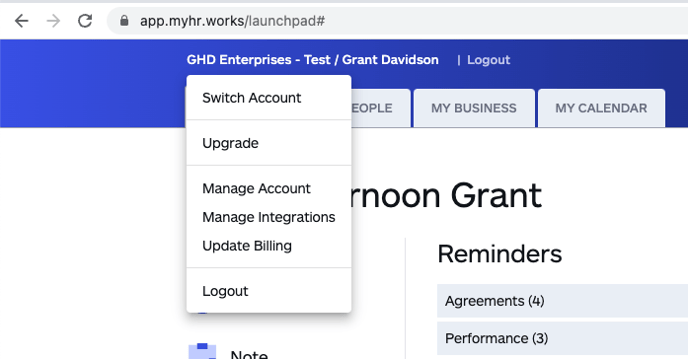
- Select 'Add item' (If you have no existing integrations, you can skip this step).
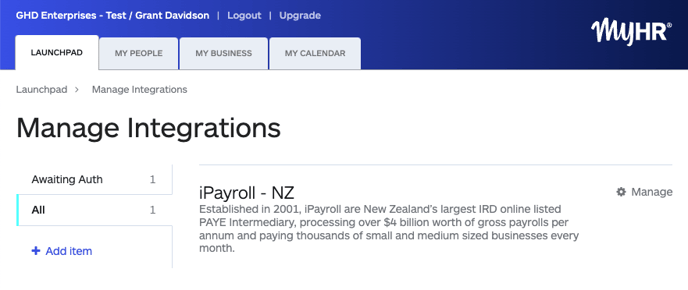
- Select 'Add' on Custom Payroll powered by Zapier

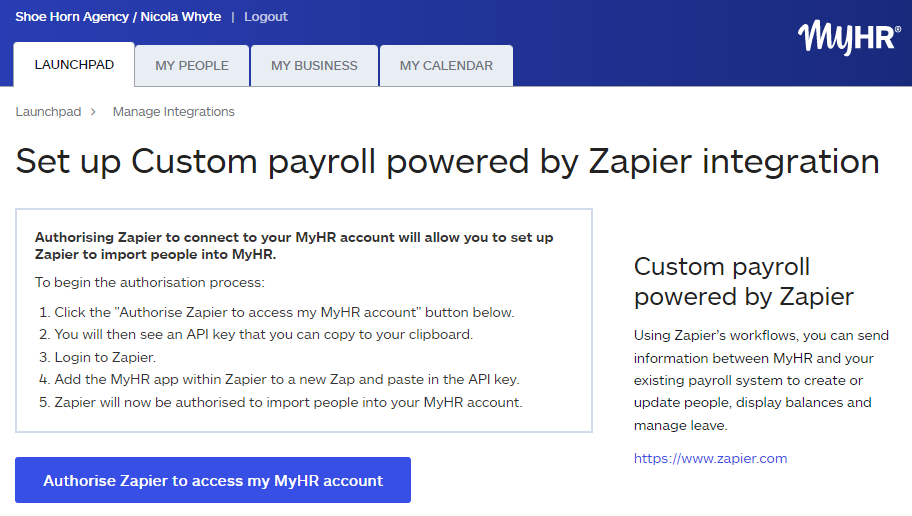
- Select 'Authorise Zapier to access my MyHR account'
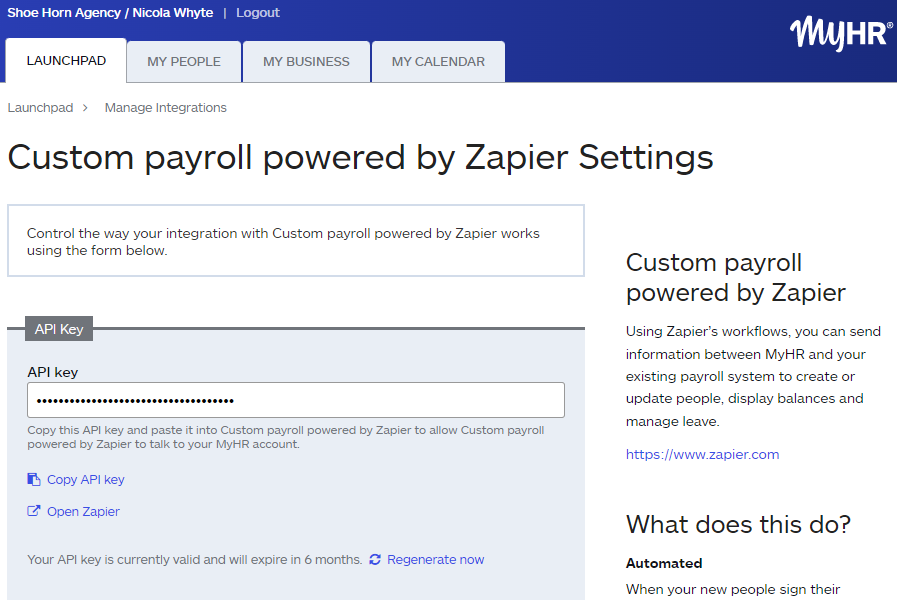
- The API key in this page will be needed when you connect your zaps (an automated workflow created in Zapier that connects your apps together) to MyHR so select ‘Copy API key’ then select ‘Open Zapier’ and move on to part 2 - Create Zaps to transfer data between MyHR and your payroll system
Part 2 - Create Zaps to set up leave balance types and leave request types for your business
In Zapier, we are going to set up two Zaps which will provide the types of leave to display balances for and allow users to select from when they are requesting leave. These types apply to everyone in your organisation and need to be set up before people are able to leave and approve leave requests and see balances.
- To start the process, go to zapier.com/app/zaps and select ‘Create Zap’ and then name your Zap eg. Create leave request types (the Zap name is located in the top-left corner after you select Create Zap).
- Set up your trigger
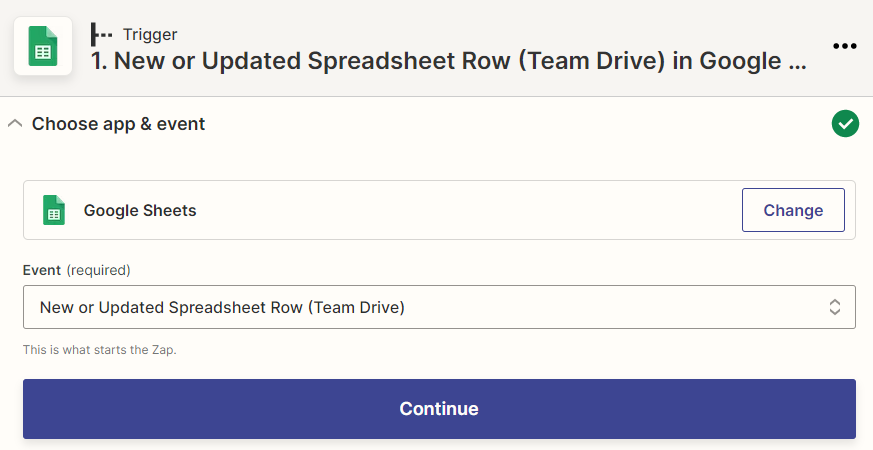
- Search for and select the app you'll be using to provide the information and the event - this could be your payroll system or another app such as Google Sheets, and the event should be related to a new leave type being available. For this example, we'll use Google Sheets as our app and 'New or Updated Spreadsheet Row' for our event.
- Connect your account with Zapier following the relevant steps in Zapier.
- Set up your trigger data: for the leave request and balance types, MyHR will need the following data: unique ID, name, units. Find examples of data received by MyHR.

- Test: Add data to the app you are using as your trigger and test it out.

- Search for and select the app you'll be using to provide the information and the event - this could be your payroll system or another app such as Google Sheets, and the event should be related to a new leave type being available. For this example, we'll use Google Sheets as our app and 'New or Updated Spreadsheet Row' for our event.
- Set up your actions
- Choose app & event: Search for and select the MyHR app. You'll need a Zap for the event 'Create Leave Request Type in MyHR' and another Zap for the event 'Create Leave Balance Type in MyHR'.

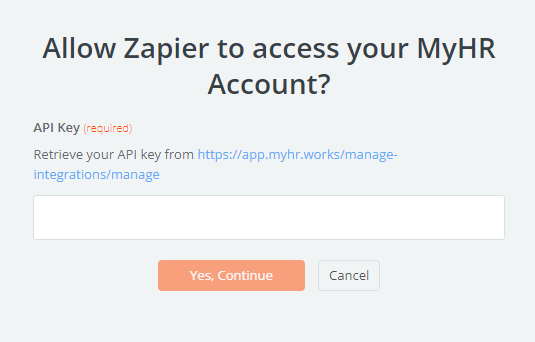
- Choose or connect your MyHR account. If you are connecting to your MyHR account, you'll be prompted to provide the API key from part 1 - Create and authorise your Zapier integration. This account your are connecting to will need to be an owner role or manager role with the permission to manage integrations.
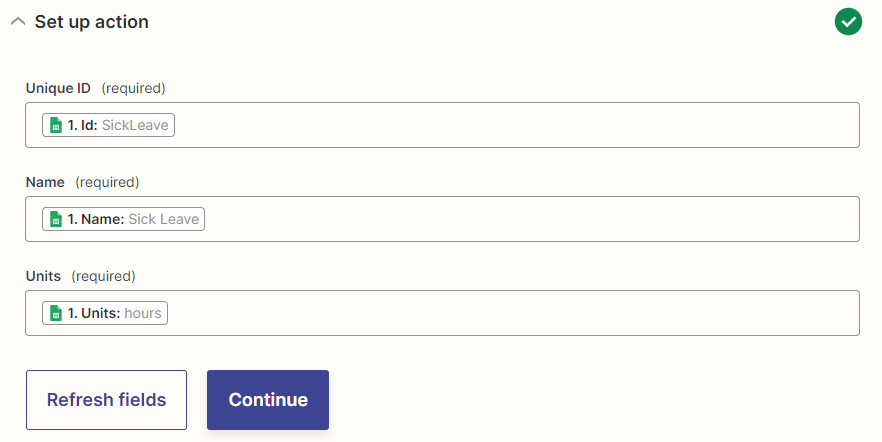
- Set up the action data: map the data from the trigger to the data needed in the MyHR action.
- Test: Add data to the app you are using as your trigger and test it out.
- Publish your Zap and if you haven't already, create the second Zap to create leave balance types in MyHR following the same steps above but selecting 'Create Leave Balance Type' as your action event.
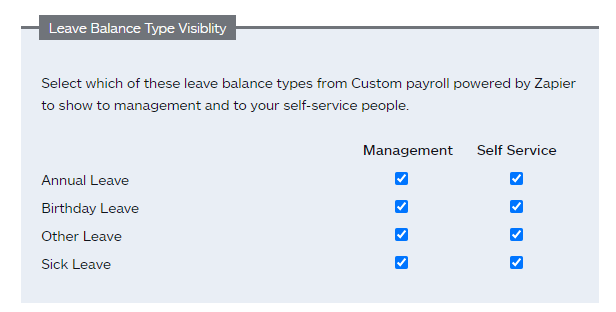
- Once your Zap has run to create your balance types (check your Zap history), update your integration settings on MyHR: you'll need to log in to MyHR, go to Manage integrations, select 'Custom payroll powered by Zapier' and update the visibility of your leave balance types.
- Choose app & event: Search for and select the MyHR app. You'll need a Zap for the event 'Create Leave Request Type in MyHR' and another Zap for the event 'Create Leave Balance Type in MyHR'.
Part 3 - Create Zaps to set up MyHR people in your payroll system
In Zapier, we are going to set up a zaps so that when a person is activated, their details are sent through to your payroll system and following that, a link needs to be established between the MyHR person and the person in your payroll system. You will need to understand how to create a zap in Zapier (read the article Create a Zap).
- Create a Zap to send people to payroll: to start the process, go to zapier.com/app/zaps and select ‘Create Zap’ and name your Zap eg. Set up person in payroll (find the Zap name in the top-left in Zapier).
- Set up your trigger
- Search for and select the 'MyHR' app.
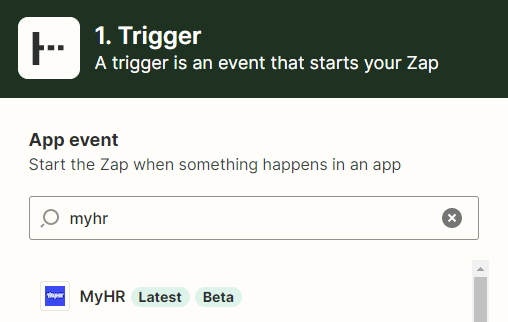
- Choose your trigger
For this example, we’ll use the ‘Person has been activated’ trigger but you will need a Zap for each of these triggers:
- Person Has Been Activated
- Person Has Been Deactivated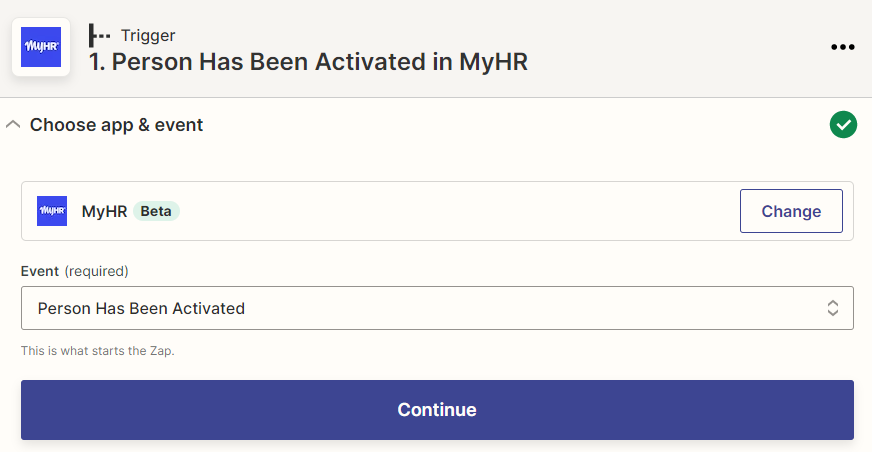
- Connect to your MyHR account.
- Select ‘Continue’ and then ‘Test Trigger’ to confirm that the Zapier can access your MyHR account.

- Connect your payroll’s Zapier app to your payroll account (if required, your payroll provider will have instructions on how to do this).
- Search for and select the 'MyHR' app.
- Set up your action
-
- Search for and select the app you'll be using to receive the employee record such as your payroll software. You can select your Payroll application and then next select the action that you need. For this example, it will be an event that will create a person/employee in the payroll system and we'll use Google Sheets as our trigger app.
- Set up the action data: map MyHR fields to the available payroll action fields.

- Test action: activate a person in MyHR to send a test person to your payroll. After doing this, you should be able to see the test person in your payroll system (your payroll provider will have instructions on how to find this test person).
- You can now publish the zap via the ‘Publish’ button.
- You can see the MyHR triggers for your published zaps in the MyHR Zapier settings page.

Part 4 - Create Zaps to link your people
In order for MyHR to send the right data with leave approvals and cancellations, or recognise the data that you'll send with leave balances, you'll need a Zap to establish a connection between MyHR and your payroll. You will need to understand how to create a zap in Zapier (read the article Create a Zap).
- Create a Zap to link your person in MyHR with your payroll employee: select ‘Create Zap’ and name your Zap eg. Link people in payroll (set the Zap name in the top-left in Zapier). This will take the ID from your payroll system and link it to the ID in the MyHR system.
- Set up your trigger
- Search for and select the app you'll be using to provide the person details and the event - this could be your payroll system or another app such as Google Sheets, and the event should be related to new person being available. For this example, we'll use Google Sheets as our app and 'New or Updated Spreadsheet Row' for our event.

- Connect your account with Zapier following the relevant steps in Zapier.
- Set up your trigger data: for the person integration, MyHR will need the following data: unique ID, first name, last name and email. You can send through more data if you have it including the MyHR person ID, which will link the employee records automatically. If you only send the employee ID from the payroll, you'll need to manually link the records in your integration. Examples of data received by MyHR.

- Test: Add data to the app you are using as your trigger and test it out.
- Search for and select the app you'll be using to provide the person details and the event - this could be your payroll system or another app such as Google Sheets, and the event should be related to new person being available. For this example, we'll use Google Sheets as our app and 'New or Updated Spreadsheet Row' for our event.
- Set up action
-
- Choose app & event: Search for and select the MyHR app and the 'Create person integration' event.

- Choose account
- Set up action data
Map the relevant fields to the MyHR person integration data. Examples of data received by MyHR. - Test action: Set up an employee on your payroll side and test that the data is sent through.
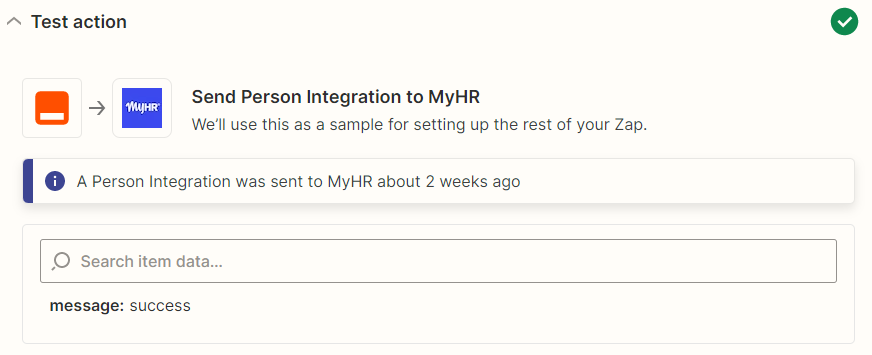
- Publish your Zap.
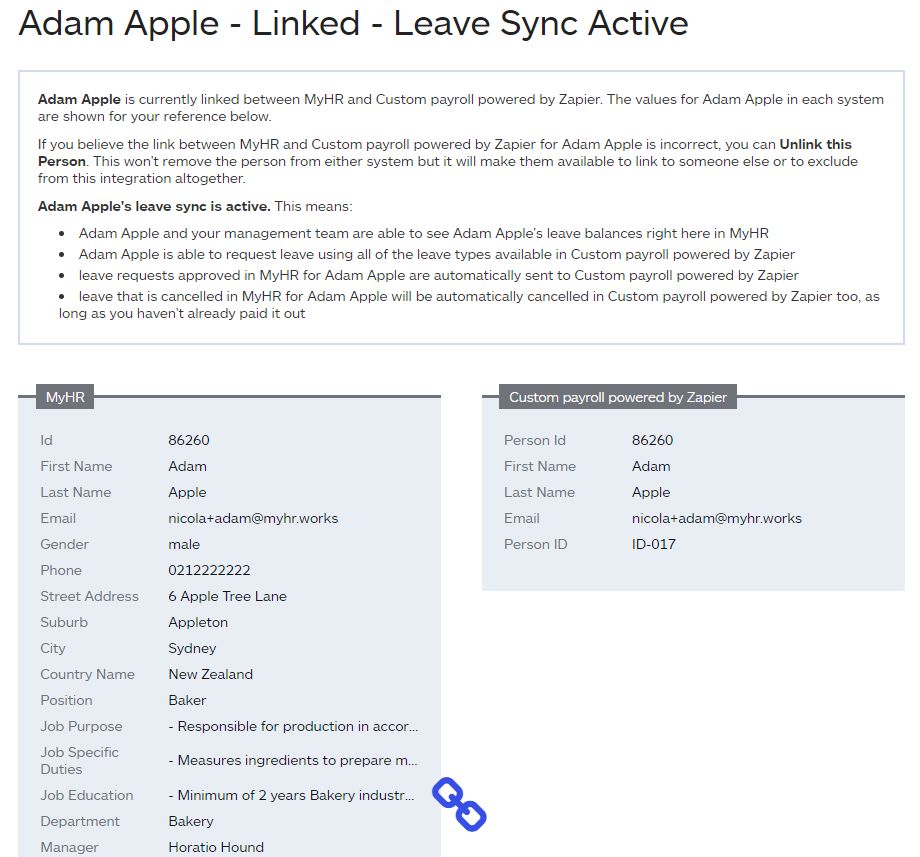
- When your Zap runs successfully and links your people, you should see a link established between MyHR and your payroll and your person will show as linked.
- Choose app & event: Search for and select the MyHR app and the 'Create person integration' event.
Part 5 - Set up leave approvals and cancellations
- To start the process, go to zapier.com/app/zaps and select ‘Create Zap’ and then name your Zap eg. Approved leave (the Zap name is located in the top-left corner after you select Create Zap).
- Set up your trigger
- Search for and select the 'MyHR' app.

- Choose your trigger
For this example, we’ll use the ‘Leave Has Been Approved’ trigger but you will need a Zap for each of these triggers:
- Leave Has Been Approved
- Leave Has Been Cancelled
- Choose account
- Test trigger: select ‘Continue’ and then ‘Test Trigger’ to confirm that Zapier can access your MyHR account.
- Search for and select the 'MyHR' app.
- Set up your action
- Search for and select the app you'll be using to receive the employee record such as your payroll software. For this example, we'll use Google Sheets.
- Set up the action data: Map the relevant fields to the MyHR person integration data. Examples of data received by MyHR.

- Test action: Approve a leave request and test that the data is sent through.
- You can now publish the zap via the ‘Publish’ button. You will see the MyHR triggers for your published zaps in the MyHR Zapier settings page.
- If you haven't already, create a Zap for cancelled leave requests following the same steps in this section.
Part 6 - Display leave balances
In order to display leave balances for people in MyHR, you'll need to have set up leave balance types and leave request types following the steps in part 2, and ensure your people are linked, following the steps in part 4.- Select ‘Create Zap’ and then name your Zap eg. Leave balance (the Zap name is located in the top-left corner after you select Create Zap).
- Set up your trigger
- Search for and select the app you'll be using to provide the information and the event - this could be your payroll system or another app such as Google Sheets, and the event should be related to a new or updated leave balance. For this example, we'll use Google Sheets as our app and 'New or Updated Spreadsheet Row' for our event.

- Connect your account with Zapier following the relevant steps in Zapier.
- Set up your trigger data: for a leave balance, MyHR will need the following data: the payroll system ID, available balance name (for each balance type), approved balance name (for each balance type), number of units (for each balance type, both available and approved). Find examples of data received by MyHR.
- Test: Add data to the app you are using as your trigger and test it out.
- Search for and select the app you'll be using to provide the information and the event - this could be your payroll system or another app such as Google Sheets, and the event should be related to a new or updated leave balance. For this example, we'll use Google Sheets as our app and 'New or Updated Spreadsheet Row' for our event.
- Set up your action
-
- Choose app and select 'Create leave balance' as the event.

- Choose or connect your MyHR account.
- Set up the action data: map the data from the trigger to the data needed in the MyHR action.

- Test: Add data to the app you are using as your trigger and test it out.
- Publish your Zap.
- Choose app and select 'Create leave balance' as the event.
This should give you a set of Zaps to cover creating people and linking them between MyHR and your payroll, setting up your leave request and balance types for your business, sending approved and cancelled leave requests, and fetching leave balances for your employees.
Data sent by MyHR triggers
To help you map the fields in Zapier from your payroll, we have provided a list of data that will be sent or received by MyHR.
Person data
Person data is sent from the following triggers:
- Person Signed Their Agreement
- Person Has Been Activated
- Person Has Been Deactivated
|
Field name |
Field details |
| First name | |
| Last name | |
| Gender | |
| Title | |
| Phone number | |
| Street address | |
| Suburb | Suburb or second line of address |
| City | |
| Postcode | |
| Region | Region abbreviation eg. NSW - AU employees only |
| Start date | The employee's first day of work and the date this agreement comes into effect |
| Contract start date | The date the contract comes into effect |
| Work visa expiry date | |
| Birth date | |
| Job title | |
| Job purpose | A 1-2 sentence statement that sums up the main purpose of this job |
| Job-specific duties | The work done by the person in this job, it includes their responsibilities and can also include decision-making authority |
| Job education | |
| Department | |
| Manager name | |
| Manager title | |
| Type of employment | permanent, casual, fixed_term, independent_contractor |
| End date | This is the date the fixed term employment ends or is anticipated to end |
| Reason for fixed term | The reason the term is fixed rather than permanent |
| Maximum weekly hours of work | Maximum number of hours worked per week |
| Weekly hours of work | Number of hours worked per week |
| Pay type | annual_salary, weekly_wage, hourly_wage |
| Pay rate | Dollar amount of pay |
| Pay period | How often does the payment occur? (weekly, fortnightly, monthly) |
| Pay day | For example, this could be a day of the week |
| Other pay or benefits | This can include an annual bonus, company car, mobile phone wit personal use or anything over-and-above the salary or wage |
| Notice period | This is the amount of notice that an employee must give if they resign, it is also the amount of notice you must give in some cases of termination, other than summary dismissal |
| Primary work location | Address or city where the employee will mostly work |
| Collective agreement | Is the employee part of a collective agreement? |
| Trading name | For example, a contractor's company name |
| Bank name | Name of the employee's bank for payment |
| Bank account number | Employee's bank account number for payment |
| Bank account name | Name on the employee's bank account |
| Emergency contact name | |
| Emergency contact relationship | For example, spouse |
| Emergency contact daytime phone | |
| Emergency contact after-hours phone | |
| Additional information | For anything else that has not been already included. This might relate to previous history, any special considerations for this employee etc |
| Self-service | This allows the employee to use MyHR to view and e-sign their employment agreement, use the online leave scheduling tool and performance management module |
| Performance reviews | Whether the employee will have performance reviews |
| Leave enabled | Whether the employee can request leave |
| IRD number | NZ employees only |
| Tax code | NZ employees only |
| Tax file number | AU employees only |
| Tax scale | AU employees only |
| Contractor business number | AU employees only |
Leave data
Leave data is sent from the following triggers:
- Leave Has Been Approved
- Leave Has Been Cancelled
|
Field name |
Field details |
|
Leave Id |
A unique number for this leave request |
|
Person Id |
The MyHR person ID |
|
Person name |
First & last name of the person for who leave is being created |
|
Unit |
hours or days |
|
Leave name |
Description of the leave type |
|
Leave type |
Selection from the supplied “Leave Request Type” |
|
Start date |
yyyy-MM-dd |
|
End date |
|
|
Days |
JSON array of hours per day for each day of leave (including 0 for weekends and holidays) e.g. "[8,8,0,0,8]" |
|
Total hours |
|
|
Status |
|
|
Comment |
Data received by MyHR actions
Create person integration
The 'Create Person Integration' action expects the following data:
|
Field name |
Required |
Field details |
|
Unique ID |
Yes |
ID of the employee in the Payroll system |
|
MyHR Person ID |
If supplied, this will link the supplied employee to their MyHR record. |
|
|
First Name |
Yes |
|
|
Last Name |
Yes |
|
|
|
Yes |
|
|
Phone number |
||
|
Street address |
||
|
Suburb |
Suburb or second line of address. |
|
|
City |
||
|
State |
State (abbreviation, e.g. 'NSW') |
|
|
Postcode |
Create leave request type
The 'Create Leave Request Type' action expects the following data:
|
Field name |
Field details |
|
Unique ID |
E.g. “AnnualLeave” |
|
Name |
Name of the request type e.g. “Annual Leave” |
|
Units |
hours or days |
Create leave balance type
There is usually a one-to-one relationship between leave request and balance request types.
The 'Leave Balance Type' action expects the following data:
|
Field name |
Field details |
|
Unique ID |
E.g. “AnnualLeave” |
|
Name |
Name of the request type e.g. “Annual Leave” |
|
Units |
hours or days |
Create leave balance
The fields for the ‘Create Leave Balance’ action are mostly defined by the entries created by the ‘Create Leave Balance Type’ action. The table below assumes that only the leave balance type ‘Annual Leave’ has been created and that it has units of ‘hours’. For each balance type, you should provide an available unit value and an approved unit value.
|
Field name |
Field details |
|
Person ID |
The person’s payroll system ID |
|
Annual Leave - available |
The number of hours available for “Annual Leave” |
|
Annual Leave - approved |
The number of hours approved for “Annual Leave” |
Getting help with Zapier
The MyHR Zapier app is available on Zapier.com - if you are interested in particular templates between apps to get you up and running quicker, contact our customer success team so we can discuss your requirements.
